viernes, 28 de agosto de 2015

PAELLA

Paella Vegana. La paella es uno de los platos más típicos de la gastronomía española. Esta paella es vegana y es más sana, ligera y económica que la tradicional | danzadefogones.com #danzadefogones #vegano #singluten

Paella Vegana. La paella es uno de los platos más típicos de la gastronomía española. Esta paella es vegana y es más sana, ligera y económica que la tradicional | danzadefogones.com #danzadefogones #vegano #singluten

PREP
COCCIÓN
TOTAL
 
La paella es uno de los platos más típicos de la gastronomía española. Esta paella es vegana y es más sana, ligera y económica que la tradicional.
Autor: 
Tipo de receta: Arroz
Cocina: Vegana, Sin Gluten, Española
Raciones: 4
INGREDIENTES
  • 2 cucharadas de aceite de oliva virgen extra
  • 4 dientes de ajo
  • ½ cebolla
  • ½ pimiento rojo
  • ½ pimiento verde
  • 2 tomates
  • 1 taza de corazones de alcachofas congelados (120 gramos)
  • ½ taza de judías verdes congeladas (75 gramos)
  • ½ taza de guisantes congelados (65 gramos)
  • 1 y ¼ tazas de arroz Basmati (240 gramos)
  • 4 tazas de caldo de verduras (1 litro)
  • 2 cucharaditas de cúrcuma
  • 1 cucharadita de pimentón dulce
  • Sal y pimienta negra al gusto (opcional)
INSTRUCCIONES
  1. Echa el aceite en la paella y cuando esté caliente echa los ajos, la cebolla, el pimiento rojo y el pimiento verde, todos ellos troceados. Cocina a fuego medio hasta que se doren.
  2. Echa los tomates y cocina durante unos 5 ó 10 minutos.
  3. Añade los corazones de alcachofas, las judías verdes y los guisantes y cocina unos 5 minutos más.
  4. Echa el arroz y déjalo hasta que los bordes empiecen a trasparentarse. Añade el caldo (que ha de estar caliente), la cúrcuma y el pimentón. Salpimenta al gusto.
  5. Deja cocinar a fuego medio o medio alto durante unos 15 ó 20 minutos o hasta que el arroz esté hecho. Si necesita más caldo, añade más sobre la marcha.
  6. Lo ideal es dejar reposar la paella tapada antes de comerla, al menos 5 ó 10 minutos.
INFORMACIÓN NUTRICIONAL
Tamaño de ración: ¼ de la receta Calorías: 384 Grasas: 9.3 g Grasas saturadas: 1.6 g Carbohidratos: 63 g Azúcares: 5.4 g Sodio: 812 mg Fibra: 6 g Proteínas: 12.6 g

PASTEL REINA DE SABA


Tiempo de preparación: ~1 hora + tiempos de enfriado
Raciones: para 6-8 personas
Ingredientes:
♥ 85 g de chocolate sin leche para repostería (~56% de cacao)
♥ 30 g de chocolate negro sin leche (~75% de cacao)
♥ 1 cucharada de extracto de café
♥ 2 cucharadas de leche de soja
♥ 1/3 de taza de harina de almendras (almendra molida)
♥ 1/2 taza de harina de repostería (harina para bizcochos y tartas)
♥ 1 cucharadita y 1/2 de levadura de repostería
Mezcla 1:
♥ 90 ml de leche de soja
♥ 130 ml de aceite de girasol
♥ 5 cucharadas de azúcar
Mezcla 2:
♥ 2 cucharaditas de almidón de maíz (maizena)
♥ 1 cucharadita y 1/2 de almidón de tapioca
♥ 2 cucharadas de azúcar
♥ 1/4 de cucharadita de cremor tártaro
♥ 3 cucharadas de agua fría
Cobertura:
♥ 60 g de chocolate sin leche para repostería (~56% de cacao)
♥ 10 g de chocolate negro sin leche (~75% de cacao)
♥ 1 cucharada de extracto de café
♥ 1 cucharada de margarina vegetal
♥ 1 cucharada de azúcar glacé
♥ 30 ml de leche de soja
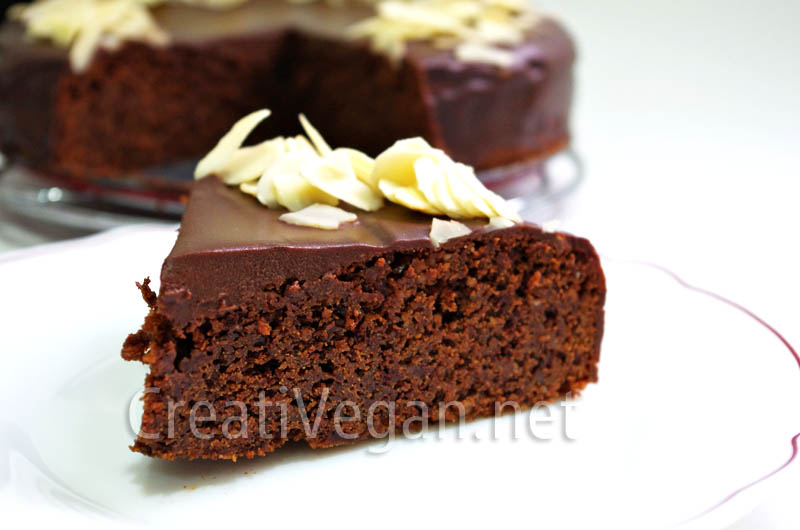
♥ almendras laminadas para decorar
Necesitarás además un molde redondo para tartas (preferiblemente desmontable) de 20 cm de diámetro y una batidora de brazo (preferiblemente regulable) con accesorio de varillas (normal o montaclaras).
Lee toda la receta, incluyendo anotaciones y toda la explicación, antes de empezar a hacerla.
Precalienta el horno a 180ºC.
Unta muy ligeramente todo el interior del molde con margarina vegetal y espolvoréalo con harina. Golpéalo boca abajo para eliminar el exceso de harina.
Mezcla 1: Pon en un vaso para batidora de brazo la leche de soja con el azúcar y bátelo a velocidad media durante 1 minuto. Agrega poco a poco el aceite de girasol para crear una emulsión (como una mayonesa vegetal dulce). Cuando esté hecha, ponla en un bol grande donde haremos toda la masa de la tarta.
Mezcla 2: En el mismo vaso en el que hemos hecho la emulsión (bien limpio y seco) o uno parecido, pon los almidones y el agua. Bátelo con el accesorio de varillas de la batidora a velocidad media durante 2 minutos y después súbelo al máximo. Agrega el cremor tártaro y sigue batiendo. Después, el azúcar, y bátelo 2 minutos más. La mezcla debe quedar densa y con burbujitas. Resérvala.
Derrite en un cacito pequeño a fuego lento o al baño maría el chocolate para repostería con el chocolate negro sin leche (partidos en trocitos) y la leche de soja, removiendo suavemente. Cuando se haya derretido agrega el extracto de café, mézclalo y apártalo del fuego.
Pon en la batidora de nuevo el accesorio de varillas. Bate a velocidad media la emulsión que habíamos hecho al principio, en un bol mezclador grande. Vierte poco a poco y sin dejar de batir el chocolate derretido (puedes ayudarte con una espátula de silicona para rebañar bien todo el cazo). Después, poco a poco, la harina de almendras, la mezcla de almidones y por último la harina de repostería mezclada con la levadura. Bate toda la mezcla 1 minuto más a velocidad alta y viértela en el molde.
Mételo al horno a altura media (en el centro), con calor arriba y abajo (sin ventilador) y deja que se haga a 180ºC durante 30 minutos. Tras ese tiempo apaga el horno y deja el bizcocho dentro 10 minutos más, sin abrir la puerta del horno.
Sácalo y déjalo enfriar sobre una rejilla. No lo saques del molde hasta que esté frío. Cuando se haya enfriado déjalo en la nevera.
Para decorarlo, pon en un cacito a fuego lento o al baño maría todos los ingredientes de la cobertura (excepto las almendras) y derrítelos removiendo suavemente. Apártalo del fuego y deja que se enfríe un poco en un lugar fresco (no lo metas en la nevera).
Dale una primera capa al bizcocho con 3 o 4 cucharadas de cobertura, extendiéndolas muy bien por la superficie y los lados, con una espátula. Mételo en la nevera 5 minutos.
Sácalo y pon el resto de la cobertura, poco a poco, alisando bien los bordes, y termina la presentación con las almendras laminadas. Deja la tarta en la nevera para que termine de solidificar el chocolate.

Make Your Own Vegan Cheese - It Melts & Slices!

Resultado de imagen para Make Your Own Vegan Cheese - It Melts & Slices!


Vegan Cheese Ingredients:
1 1 /2 cups Soy Milk (or non-dairy milk of your choice)
1/2 cup raw cashew nuts
3 tbs almond meal
1 tbs lemon juice
3 tbs grape seed oil (or oil of choice)
2 tbs agar agar powder (mixed with 1/2 cup + 2 tbs boiling water)
2 tbs miso paste
1 tsp vegetable stock powder
1/2 tsp white pepper
1/2 tsp Himalayan salt

Website: www.cookingwithplants.com
Facebook: www.facebook.com/Cookingwithplants

https://www.youtube.com/watch?v=xFcp41bcfxU

GARLIC MOZZARELLA

Resultado de imagen para Creamy Cultured Garlic Mozzarella | Vegan Recipe


RECIPE FOR GARLIC MOZZARELLA
Click here for the printable recipe and full story: http://www.marystestkitchen.com/vegan...

INGREDIENTS

1/2 batch of cultured cashew cream cheese (about 1 1/4 cups worth) [https://www.youtube.com/watch?v=tw0wr...]
4 tablespoons tapioca flour
2 tablespoons lemon juice
2 tablespoon organic canola oil or other light tasting oil
1 tablespoon kappa carageenan
1 teaspoon xantham gum (optional)
1 to 1 1/2 teaspoons salt
1 clove garlic, minced
1/2 cup or more water

DIRECTIONS

Combine all the ingredients except the water in a saucepan and mix thoroughly.

Add enough water so that the mixture becomes like a very thick pancake batter. Start at 1/2 cup and increase if necessary. The amount depends on how liquid or thick your cashew cream cheese was.

Place the saucepan over medium heat and stir the mixture continuously for 6 to 8 minutes. 

As it heats, the mixture will pull away from the sides and start clumping together.

When mixture becomes next to impossible to stir, taste it to test if the tapioca has completely cooked. Heat while stirring for a bit longer if it still has a grainy-starchiness to it. However, once you have the desired texture, take it off the heat! Overheating can cause the mixture to separate.

Smooth the garlic mozzarella into a clean bowl to cool.

Chill in the fridge so that the cheese completely solidifies.

Cultured Almond Cheese - Gruyère Style


Resultado de imagen para Cultured Almond Cheese - Gruyère Style


This cultured almond cheese is sharp and strong with a earthy, musky undertone that's hard to describe. The kind of flavour that will have you asking, "Is this *really* vegan?!" 

Really, trying to describe this cheese is just too hard; you just have to try it! The texture, however, is not like Gruyère though. Where the Swiss dairy version is smooth, this version is more crumbly. 

To make this firm cheese, first you have to start with Cultured Almond Cream Cheese. Recipe & video here:https://www.youtube.com/watch?v=2hqAU...

Store-bought cream cheese will NOT work. But don't worry, making it yourself is super easy. If you can operate a blender, you can make this cheese!

VEGAN CULTURED ALMOND GRUYERE
Printable recipe and full story here: http://www.marystestkitchen.com/almon...

INGREDIENTS
A half batch of Cultured Cultured Almond Cream Cheese, about 1 1/4 cups worth. (https://www.youtube.com/watch?v=2hqAU...)
1 heaping teaspoon of nutritional yeast
1 heaping teaspoon of organic miso paste (light or brown)
1/2 teaspoon salt (optional), plus more for sprinkling (not optional)

DIRECTIONS
Mix almond cream cheese with nutritional yeast, miso paste and salt (if using) together thoroughly.

Line a bowl with a few layers of clean cheesecloth.

Spoon the cheese mixture into the bowl. Spread it out, smoothing away air pockets. You can also knock it a few times on the counter to reduce air pockets.

Gather the edges of the cloth together and twist at the top to wrap the cheese fairly tightly.

Secure with a clean twist tie, rubber band, or kitchen twine.

Sprinkle salt all over the surface of the cheesecloth around the cheese ball. This will help reduce the chance of spoilage.

Place it on a rack to let it dry on all sides. Some water may drip so use something to catch the drops.

Leave it to culture at room temperature for 1-3 days. You may taste it every so often to check on the flavour development. Use a clean utensil every time to reduce the chance of contamination.

After the cheese gets fairly sharp and more solid, unwrap the cheese and shape it to your preference. Make sure to use clean hands. You can use a spatula to help or use a cheese mold.

Sprinkle salt on all sides of the cheese. This salt is NOT optional. You need it to reduce the chance of mold.

Set it on a rack again to age further for 2-4 days. A brown rind will develop and the flavour will keep developing. You can cover it with a clean cheesecloth to keep away dust.

It's ready to enjoy when the cheese reaches your preferred taste and hardness.

Store the cheese in an airtight container in the fridge for a week or more.

NOTES
When making cultured foods, make sure all your equipment is clean and sterile to reduce the chance of spoilage or contamination.

This cheese will develop a yellowish-brown rind as it drys but should be creamy white on the inside. If discoloration appears, the safest option is to throw it out.


https://www.youtube.com/watch?v=oa0uRrIQS0I

BASIC CULTURED ALMONDS

Resultado de imagen para Basic Cultured Almonds

This cultured almond recipe makes a nice, mild, spreadable vegan cheese with a bit of tang and a subtle, musky flavour reminiscent of goat cheese. This cultured almond base is intended to be combined with other ingredients and cultured further for the more complex, solid cheeses later in this Vegan MoFo series. However, it can be salted and eaten on it's own with bread or crackers.

I used rejuvelac made from wheat berries in this particular cheese because it has a musky kind of scent that makes the cheese take on goat-cheese-like characteristics. 

You're going to need three ingredients:
- raw almonds
- salt
- rejuvelac

You're also going to need:
- a large glass jar/container of some kind
- water
- a blender of some kind

Note that if you have chlorinated tap water like me, you're going to want to de-chlorinate it before using. You can let a pitcher sit out for a couple hours and the chlorine will dissipate. Or, use boiled water that has cooled to room temperature.

As we're fermenting stuff at room temperature, it's super important to work with all clean, sterile equipment. Be aware of cross-contamination (especially when tasting).

BASIC CULTURED ALMOND CHEESE RECIPE

INGREDIENTS
2 cups raw almonds
pinch of salt
1/4 cup or more rejuvelac (use rejuvelac made from wheat for a muskier quality)

DIRECTIONS

Soak almonds for 8 to 12 hours at room temperature.

De-skin the almonds. Discard the skins and rinse the skinned almonds.

Combine the almonds and a pinch of salt in your blender. 

Add about a quarter cup of rejuvelac and start to blend on a medium speed setting.

Increase the blender speed as the almonds break down. Add more rejuvelac as necessary to keep the mixture blending. You may need to pause the blender and tamp the ingredients down. Continue until the mixture is very smooth.

Transfer the almond mixture to a clean glass bowl. Using a clean utensil, take a bit to taste. It should taste bland, just like raw almonds.

Cover and let ferment at room temperature for a day or two. Taste it to test flavour development. It will develop a mild tanginess and take on a milky, yogurt-y flavour. It will get stronger as it ferments.

After that, it's ready to use! Combine it with more salt to taste and feel free to add herbs and spices. Or, use it as a base in other more complex vegan cheese recipes.

Store this almond culture in the fridge until you're ready to use it. It will continue to ferment slowly so keep tasting to keep track of flavour development.

Enjoy!

OH P.S. You can do the exact same thing with other nuts/seeds. Different nut/seeds with different combinations of rejuvelac will yield different flavours. Go ahead and experiment!


https://www.youtube.com/watch?v=2hqAUFf9RZ8
( BASE PARA HACER QUESO)